
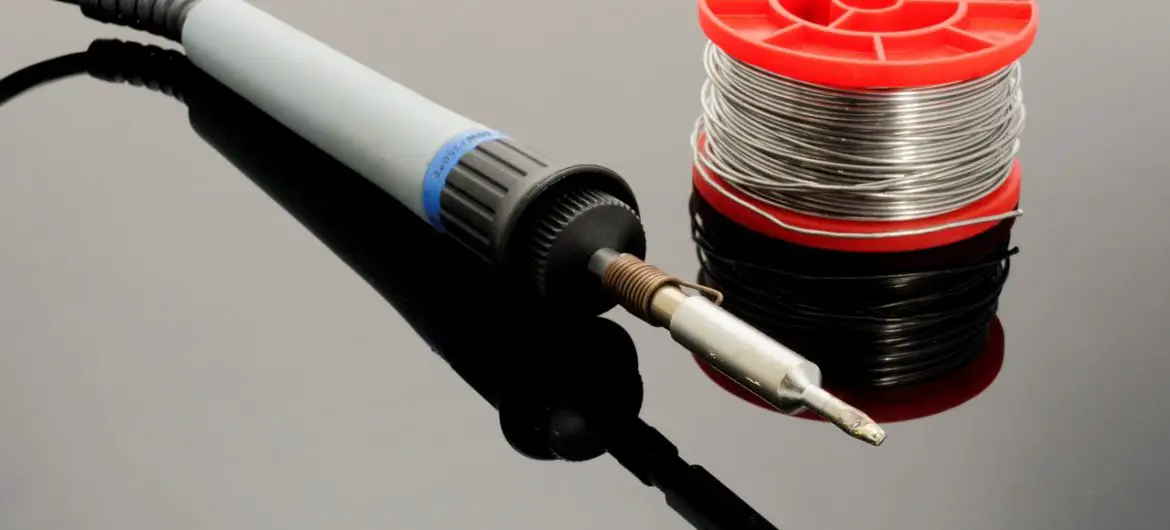
The soldering iron is a tool that is used in the process of ‘soldering’, which involves melting an alloy known as solder to bond two pieces of metal together.
It is predominantly used in Electronics and Electrical applications to solder components to Printed Circuit Boards (PCB’s) or joining electrical wires.
But, soldering irons are used for many other applications that include Jewelry, joining stained glass and wood burning (for design purposes).
The main purpose of a soldering iron is to melt the solder.
However, sometimes the soldering iron might have problems melting the solder.
So, what could be the issues that can prevent a soldering iron from melting solder?
Below are some possible problems:
- Heating element of soldering iron broken
- Soldering iron temperature not hot enough
- Soldering iron has not had enough time to heat up. Also, sometimes the soldering iron plug is not plugged into electrical outlet properly
- Low wattage soldering iron (especially cheaper soldering iron)
- Tip has been oxidized
- Using the wrong solder
For a more detailed explanation for each reason read on.
I will also highlight ways to fix the issue, as well as how you can avoid this happening again.
How a soldering iron melts solder
Before we dive into the details of why your soldering iron is not melting solder, it will help to have a quick look at the different parts of a soldering iron.
While there are a wide variety of soldering irons that range in complexity, there are a handful of parts and components that each of them share.
Below is a list of the common parts of a soldering iron.
- Cord
- Handle cover
- Handle
- Terminal Board
- Heating element
- Tip
- Tip enclosure
The two parts that we are concerned with are the Tip and the Heating Element, as these are the two main parts that could be the reason why the soldering iron is not melting the solder.
Heating Element – this part of the soldering has the job of heating the tip through the means of electricity.
Tip – The Tip is the part of the soldering iron that heats up and makes contact with the solder and surfaces to be adhered together. Soldering tips come in a range of sizes and shapes.
6 reasons why your soldering iron is not melting solder
Ok, let us dive into the possible reasons a soldering iron is not melting solder.
Reason #1 A soldering iron is not melting solder: Heating Element is broken
So, we now know that the heating element of the soldering iron has the job of heating the tip which then melts the solder.
It is a crucial component as it converts electricity into high levels of heat.
If for some reason the heating element has stopped working, it will not be able to heat up the tip and therefore will not be able to melt solder.
Reason #2 A soldering iron is not melting solder: Not plugged in outlet properly
This might seem like a silly reason why a soldering iron is not melting solder, but trust me it has happened to me many times.
It could be that you haven’t pushed the plug in far enough, or you possibly might have mistakenly knocked the plug causing it to not make full contact with the outlet.
If you notice that your soldering iron is not melting solder, first check to make sure that the power cord of your soldering iron is securely plugged into the electrical outlet.
Many, if not all soldering irons have a status light (for safety purposes), that indicate that it has power. So another way to ensure there is a proper connection is to check that the status light is on.
Reason #3 A soldering iron is not melting solder: Not enough time to heat up
It would be nice if a soldering iron could reach its maximum set temperature as soon as it’s powered on.
Unfortunately, this is not possible. A soldering iron takes time to reach its maximum temperature. Also, each soldering iron will have its own start-up time.
So, if you are impatient like myself and try melting solder 10 seconds after powering the soldering iron, you might have some problems.
Most manufacturers will specify how long it will take a soldering iron to reach a certain temperature which you can check and know how long you will have to wait for.
If there are no specified times, you could always time how long it takes and eliminate any future anxieties.
Reason #4 A soldering iron is not melting solder: Wrong Solder
When it comes to the soldering process, there are typically three types of soldering ; Soft Soldering, Hard Soldering, and Brazing.
Each of these types of soldering has its own specific application that it is used for.
Also, each soldering process uses a specific solder that requires a certain temperature to be able to melt it.
Soft soldering – typically uses temperatures between 90 – 450 °C ( 190 – 842 °F). The types of solder used tend to be an alloy that contain Tin and Lead.
Hard Soldering – uses temperatures that are greater than 450 °C (842 °F). This type of soldering uses solder that is either Brass or Silver. Blowtorches are used to reach these high temperatures to melt the solder.
Brazing – also uses temperatures that are greater than 450 °C (842 °F). It is very similar to hard soldering.
So, if you are using the process of soft soldering with solders that are used for hard soldering or brazing, your soldering iron will not be hot enough to reach those temperatures and melt the solder.
Another issue could also be the thickness of the solder you are using. The thicker the solder the higher the temperature that is required to melt it.
Reason #5 A soldering iron is not melting solder: Cheap soldering iron
Whether buying a new house, car, phone etc, we all want to save money and get the best bargain.
But, sometimes opting for the cheaper option can cause more harm than good.
This holds very true for soldering irons.
I had initially purchased a decent soldering iron which cost a decent amount. Unfortunately, it decided to call it quits after serving me for many years.
Being the cheapskate that I am, I decided to buy a cheap soldering iron which has caused me many problems.
It takes a long time to heat up, does not get hot enough, has bad heat distribution and oxidises far too quickly.
So, to avoid these problems, fork out some cash and invest in good quality soldering iron.
Reason #6 A soldering iron is not melting solder: Oxidation
The last and most likely cause that your soldering iron is not melting solder is because the soldering iron tip has been oxidised.
You will know when your soldering iron has been oxidised when the tip turns black.
Oxidation of a soldering iron happens when the iron plating of the tip becomes iron oxide. This process happens naturally with the metal used.
It happens at room temperature at a very slow rate, but the heat of the soldering iron speeds up the process.
I will highlight how to reverse this process, as well as avoid it below.
How to fix a soldering iron that is not melting solder
Just knowing the reasons why a soldering iron is not melting solder is quite redundant. Knowing how to reverse or fix the problem will be beneficial as well.
Also, having a plan on how to avoid this happening in the future will save you time, money and stress.
The solution obviously depends on the problem. So, you will first need to identify what problem your soldering is having.
Below are possible solutions to the reasons that a soldering is not melting solder as well as ideas how to avoid them happening in the future. Some of them are pretty self explanatory, but I thought I’d still give my input.
Heating Element Broke – If your soldering iron tip isn’t black (not oxidised), is plugged in properly, has had enough time to heat up, and you are using the right solder, the heating element of the soldering iron is probably broken.
Unless you are comfortable with opening up your soldering iron and seeing what is wrong with the heating element, I recommend you take your soldering iron to a professional who can fix or replace the heating element for you.
Possible issues why a soldering iron heating element might stop working could be that water could have seeped in and short circuited it.
To avoid this, do not use the soldering iron around water, or moist areas.
Soldering iron cord not plugged properly – The best way to fix this problem is to plug the soldering iron cord back into the power outlet.
Here are some tips on how to prevent this problem from recurring.
If the soldering iron cord is placed in a path where people walk by regularly, it is going to increase the chances of someone tripping on the cord (which is a safety hazard in itself), and disconnecting the soldering iron’s cord from the power outlet.
So, place the cord out of the path of constant foot traffic.
If your soldering iron is placed on a desk but the power outlet is higher or lower, this can be an issue when connecting the power cord (especially if the soldering iron has a shorter power cord).
If the cord has no slack and has to reach awkward angles it is not going to make a proper connection with the power outlet.
Where possible try to connect your soldering iron power cord to a power outlet that is not too far away, and allow for some slack in the soldering iron power cord.
Not enough time to heat up – Fixing this problem requires a bit of patience ( I know sometimes it is hard!)
But, to avoid rushing to use the soldering iron before it has heated up, time how long it takes your soldering iron to reach the temperature where it starts to melt solder.
That way next time you turn it on you will know exactly how long it will take eliminating your frustrations.
Wrong solder – Buying the right type of solder for the soldering application will rectify this issue.
You will first need to know what kind of soldering you are doing (Soft, Hard or Brazing). Then accordingly when you are buying solder, you will have to check what kind of soldering applications it is used for and its melting temperatures.
Also, try buying solder that is smaller in diameter which is easier to melt.
Cheap soldering iron – Buy a good quality soldering iron!
Oxidation – If your soldering iron is heating up and still not melting solder, oxidation has most likely occurred to the tip of the soldering iron (you might notice this visually as the soldering iron tip will be black).
To fix this issue scrape or sand off the oxide off the tip (while it is off) using an exacto knife or 800 grit sandpaper till it has regained its shine.
Once the tip is shiny, give it a good coat of flux (if you have some. If you don’t that is fine just skip this step), and turn the soldering iron on. Once the soldering iron has heated up, coat the tip with some solder.
If for some reason you cannot reverse the oxidation process, you might have to replace the tip of your soldering iron.
Below are some good practices to follow to avoid oxidation of the soldering iron tip.
- Do not leave your soldering iron idle for long periods of time . If you are not using it for more than 15 mins, turn it off.
- Avoid high temperatures (340 – 380°C) (644 – 716 °F)
- After every use, wipe the soldering iron on a wet sponge, then coat the tip with solder. Do this before turning it off as well.


